
I recently started to look into Rust and found it quite interesting and fun to work with, reminded me of working a bit like go and C lang. Thus I though it would be good to go through a blog series on of learning Rust with VSCode.
I will be using WSL Ubuntu 20.04.3 LTS for my development. If you are not using WSL yet, it allows you to have a linux terminal right inside of your windows desktop. Windows Subsystem for Linux 2) allows users to run a Linux VM inside windows and gives a near native Linux experience.
Installing Rust
Lets install Rust in your Ubuntu environment.
|
1 2 3 4 5 |
#install the pre req $ sudo apt install build-essential #Install Rust select 1 and Proceed with installation (default) $ curl --proto '=https' --tlsv1.2 -sSf https://sh.rustup.rs | sh |
The output of the command would look like below.
|
1 2 3 4 5 6 7 8 9 10 11 12 13 14 15 16 17 18 19 20 21 22 23 24 25 26 27 28 29 30 31 32 33 34 35 36 37 38 39 40 41 42 43 44 45 46 47 48 49 50 51 52 53 54 55 56 57 58 59 60 61 62 63 64 65 66 67 68 69 70 71 72 73 74 75 76 77 78 79 80 81 82 |
info: downloading installer Welcome to Rust! This will download and install the official compiler for the Rust programming language, and its package manager, Cargo. Rustup metadata and toolchains will be installed into the Rustup home directory, located at: /home/taswar/.rustup This can be modified with the RUSTUP_HOME environment variable. The Cargo home directory located at: /home/taswar/.cargo This can be modified with the CARGO_HOME environment variable. The cargo, rustc, rustup and other commands will be added to Cargo's bin directory, located at: /home/taswar/.cargo/bin This path will then be added to your PATH environment variable by modifying the profile files located at: /home/taswar/.profile /home/taswar/.bashrc You can uninstall at any time with rustup self uninstall and these changes will be reverted. Current installation options: default host triple: x86_64-unknown-linux-gnu default toolchain: stable (default) profile: default modify PATH variable: yes 1) Proceed with installation (default) 2) Customize installation 3) Cancel installation >1 info: profile set to 'default' info: default host triple is x86_64-unknown-linux-gnu info: syncing channel updates for 'stable-x86_64-unknown-linux-gnu' info: latest update on 2022-01-20, rust version 1.58.1 (db9d1b20b 2022-01-20) info: downloading component 'cargo' info: downloading component 'clippy' info: downloading component 'rust-docs' 18.9 MiB / 18.9 MiB (100 %) 10.2 MiB/s in 1s ETA: 0s info: downloading component 'rust-std' 25.0 MiB / 25.0 MiB (100 %) 10.4 MiB/s in 2s ETA: 0s info: downloading component 'rustc' 53.2 MiB / 53.2 MiB (100 %) 10.2 MiB/s in 6s ETA: 0s info: downloading component 'rustfmt' info: installing component 'cargo' info: installing component 'clippy' info: installing component 'rust-docs' 18.9 MiB / 18.9 MiB (100 %) 6.1 MiB/s in 3s ETA: 0s info: installing component 'rust-std' 25.0 MiB / 25.0 MiB (100 %) 8.8 MiB/s in 2s ETA: 0s info: installing component 'rustc' 53.2 MiB / 53.2 MiB (100 %) 9.2 MiB/s in 5s ETA: 0s info: installing component 'rustfmt' info: default toolchain set to 'stable-x86_64-unknown-linux-gnu' stable-x86_64-unknown-linux-gnu installed - rustc 1.58.1 (db9d1b20b 2022-01-20) Rust is installed now. Great! To get started you may need to restart your current shell. This would reload your PATH environment variable to include Cargo's bin directory ($HOME/.cargo/bin). To configure your current shell, run: source $HOME/.cargo/env |
To verify your install try this command
|
1 2 3 |
$ source $HOME/.cargo/env $ rustc --version rustc 1.58.1 (db9d1b20b 2022-01-20) |
Before we jump into VSCode, lets just try to create a simple hello world first in the most basic way without cargo (rust build manager, like npm).
Simple Hello World
Open a file and call it hello.rs and paste the code into it. You can use nano or vi or vim.
|
1 2 3 |
fn main() { println!("Hello, world!"); } |
We can then compile with rustc and it will create an executable that your computer can execute/
|
1 2 3 |
$ rustc hello.rs $ ./hello Hello, world! |
Creating and Running a Project with Cargo
Lets create a new project with cargo. You may wonder what is cargo. Cargo is the Rust package manager. Cargo downloads your Rust package’s dependencies, compiles your packages, makes distributable packages, and uploads them to crates.io, the Rust community’s package registry. We will execute on your shell prompt like below and look inside the directory.
|
1 2 3 4 5 6 7 8 9 10 11 12 |
$ cargo new hello Created binary (application) `hello` package #it creates a directory called hello #lets take a look inside the dir $ cd hello $ tree . ├── Cargo.toml └── src └── main.rs 1 directory, 2 files |
What is this Cargo.toml
Cargo.toml is a configuration file for the project. The extension .toml stands for Tom’s Obvious, Minimal Language. Lets take a look at the file
|
1 2 3 4 5 6 7 8 9 |
$ cat Cargo.toml [package] name = "hello" version = "0.1.0" edition = "2021" # See more keys and their definitions at https://doc.rust-lang.org/cargo/reference/manifest.html [dependencies] |
We also have the main.rs file, let’s take a look inside that file also, we will see that it looks similar to our hello world from before. Cargo has created a hello world sample for us.
|
1 2 3 4 |
$ cat src/main.rs fn main() { println!("Hello, world!"); } |
This time rather than using rustc to compile the program, we will use cargo run to compile the source code and run it in one command:
|
1 2 3 4 5 |
$ cargo run Compiling hello v0.1.0 (/home/taswar/hello) Finished dev [unoptimized + debuginfo] target(s) in 0.64s Running `target/debug/hello` Hello, world! |
The first three lines are information about what Cargo is doing. We can also use cargo run -q to make the output to be quiet.
What about VSCode?
So we can just type code . in your terminal it will launch vscode for us and we can then go into the extension section and install rust and rust-analyzer.
Install Rust Extension
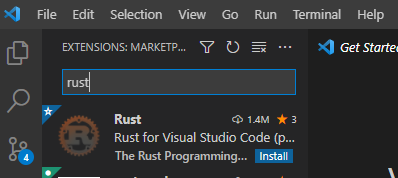
rust-extension-vscode
Run Rust in VSCode
If you install rust analyzer then you will see the Run and Debug command ontop of your code where you can click on the run command to run Rust like below.
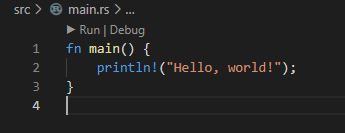
Run_Rust_In_VSCode
Here is the output that will show on your terminal.

Output_Rust_Terminal
Summary
So here is a quick summary of how to get Rust to run with vscode, in the next sections I will go through more learning of Rust and how to have fun with it.

Leave A Comment