Every voice application I’ve ever built or reviewed has the same problem: latency. The model can sound as natural as you want, but if there’s a full second of dead air between the user finishing a sentence and the assistant responding, the whole thing feels broken. Users notice a pause before they notice voice quality.
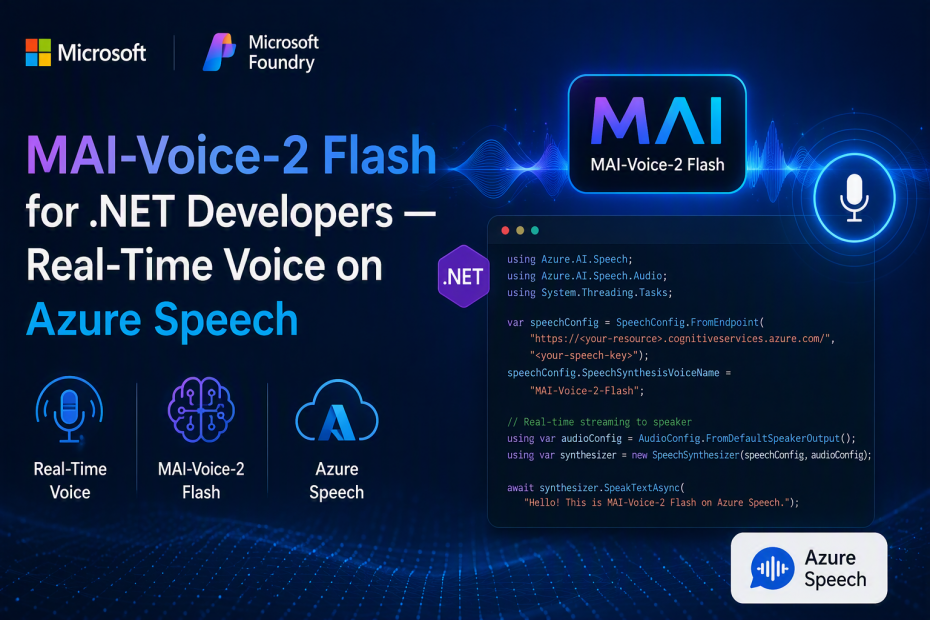
Microsoft AI just shipped MAI-Voice-2 Flash, a text-to-speech model built specifically to fix that. It’s the low-latency sibling of MAI-Voice-2, now available through Azure Speech — not a separate SDK, not a new service to learn, just a new voice option inside the Speech service you may already be using.
Same day, Microsoft also shipped MAI-Image-2.5 Pro for high-fidelity image generation (I covered that one in a separate post if you’re building creative/image pipelines). This post is about the voice model, because if you’re building call center agents, IVR systems, or conversational assistants in .NET, this is the one that actually changes your architecture.
What MAI-Voice-2 Flash Actually Does
It’s a text-to-speech model, tuned for one specific tradeoff: speed over voice customization.
- 2x faster than MAI-Voice-2, same natural voice quality
- 32% more cost-efficient
- 15+ languages supported — English (US/AU), Italian, Spanish (Mexico/Spain), Hindi, French, German, Portuguese (Brazil/Portugal), Korean, Chinese (Simplified), Turkish, Russian, Thai, Dutch, Romanian, Hungarian
- Voice cloning from 5–60 second audio prompts — natural, conversational delivery with moderate energy gives the best results
- SSML support for voice selection and pacing — see the SSML section below for what actually works today
MAI-Voice-2 Flash vs. MAI-Voice-2 — Which One Do You Actually Want?
Microsoft’s own guidance on this is refreshingly direct: it comes down to voice identity vs. responsiveness.
Choose MAI-Voice-2 Flash when:
– Low latency is the primary requirement
– You’re building conversational assistants, IVR systems, or call center experiences
– Users expect an immediate spoken response as part of a live interaction
– Cost efficiency matters as much as responsiveness
Choose MAI-Voice-2 instead when voice identity and higher-fidelity output matter more than raw speed — think narration, media production, or anything not happening in a live back-and-forth.
If your use case involves a human waiting on the other end of a phone call or a chat window, you want Flash.
Where This Fits — Real Use Cases
Microsoft calls out three scenarios, and all three map to things I’ve seen teams either build badly or avoid building entirely because of latency:
Call center agents. Spoken responses generated in real time, minimizing the delay between conversation turns. This is the difference between an AI agent that sounds like it’s thinking and one that sounds like it’s stalling.
Conversational voice assistants. Copilots and intelligent applications that respond nearly instantly — the fluid, interactive feel instead of the stilted turn-based one.
Modern IVR systems. Dynamic, context-aware phone experiences that respond to what the caller actually says instead of routing through a rigid menu tree.
If you’re maintaining a legacy IVR system held together with pre-recorded prompts and DTMF menus, or a support bot that has a noticeable pause before every response — this is worth a pilot.
Pricing
MAI-Voice-2 Flash pricing starts at $15 per 1M characters. For comparison, MAI-Image-2.5 Pro (the image model announced alongside it) starts at $5 per 1M input tokens and $106 per 1M output tokens — a completely different pricing shape, since one generates images and the other generates audio from text.
For a call center handling, say, 200-character average responses across 10,000 calls a day, that’s roughly 2M characters/day — a genuinely calculable cost before you commit to an architecture.
Setting Up Azure Speech — Full Instructions
Since MAI-Voice-2 Flash ships through Azure Speech rather than a standalone endpoint, you set it up exactly like any other Speech resource. Here’s the complete path from zero to a working API key.
Step 1: Create a Speech Resource in Azure
- Go to the Azure Portal
- Click Create a resource
- Search for Speech service (or Azure AI Foundry if you want the unified Foundry resource — both work for this)
- Click Create
- Fill in:
– Subscription — your Azure subscription
– Resource group — create new or use existing
– Region — pick a region that supports MAI-Voice-2 Flash (check the model catalog page for current regional availability — this is in public preview and region support is still expanding)
– Name — something like my-speech-resource
– Pricing tier — Standard (S0) for production use
- Click Review + Create, then Create
Step 2: Get Your Key and Region
- Once deployed, go to your Speech resource
- Click Keys and Endpoint in the left sidebar
- Copy KEY 1 and note your Region (e.g., eastus)
Step 3: Store Secrets Properly
Don’t hardcode the key. Use user-secrets for local development:
|
|
dotnet new console -n MaiVoiceFlashDemo cd MaiVoiceFlashDemo dotnet user-secrets init dotnet user-secrets set "Speech:Key" "YOUR_SPEECH_KEY" dotnet user-secrets set "Speech:Region" "eastus" |
Step 4: Install the Speech SDK
|
|
dotnet add package Microsoft.CognitiveServices.Speech dotnet add package Microsoft.Extensions.Configuration.UserSecrets |
Let’s Actually Call It from C#
Here’s a working console app that synthesizes speech using the Azure Speech SDK, configured for low-latency real-time output — the pattern you’d actually use for a conversational assistant.
Program.cs — Basic Synthesis
Sample code located at https://github.com/taswar/Mai-Voice-2-Flash-Sample
1 2 3 4 5 6 7 8 9 10 11 12 13 14 15 16 17 18 19 20 21 22 23 24 25 26 27 28 29 30 31 32 33 34 35 36 37 38 39 40 41 42 43 44 45 46 47 48 |
sing Microsoft.CognitiveServices.Speech; using Microsoft.CognitiveServices.Speech.Audio; using Microsoft.Extensions.Configuration; var config = new ConfigurationBuilder() .AddUserSecrets<Program>() .AddEnvironmentVariables() .Build(); var speechKey = config["Speech:Key"] ?? throw new InvalidOperationException("Set Speech:Key via user-secrets."); var speechRegion = config["Speech:Region"] ?? throw new InvalidOperationException("Set Speech:Region via user-secrets."); var speechConfig = SpeechConfig.FromSubscription(speechKey, speechRegion); // Voice name follows Azure Speech naming conventions — check the Foundry model // catalog / Speech Studio voice gallery for the exact MAI-Voice-2 Flash voice // identifier available in your region during public preview. speechConfig.SpeechSynthesisVoiceName = "en-US-Ava:MAIVoice2FlashNeural"; // Output directly to the default speaker. Swap AudioConfig for a file or // in-memory stream if you're serving this from a web API instead of a console app. using var audioConfig = AudioConfig.FromDefaultSpeakerOutput(); using var synthesizer = new SpeechSynthesizer(speechConfig, audioConfig); var text = "Thanks for calling. I can help you check your order status, " + "process a return, or connect you with a specialist. What do you need today?"; Console.WriteLine("Synthesizing..."); using var result = await synthesizer.SpeakTextAsync(text); if (result.Reason == ResultReason.SynthesizingAudioCompleted) { Console.WriteLine("Done. Audio played through default speaker."); } else if (result.Reason == ResultReason.Canceled) { var cancellation = SpeechSynthesisCancellationDetails.FromResult(result); Console.WriteLine($"Canceled: {cancellation.Reason}"); if (cancellation.Reason == CancellationReason.Error) { Console.WriteLine($"Error code: {cancellation.ErrorCode}"); Console.WriteLine($"Error details: {cancellation.ErrorDetails}"); } } |
Expected Output
|
|
Synthesizing... Done. Audio played through default speaker. |
You should hear the response with noticeably less delay than a standard-tier voice model — that’s the “2x faster” claim showing up as an actual user experience difference, not just a benchmark number.
Streaming to a Web API Response (Real-Time Use Case)
For an actual call center or assistant integration, you’re not playing audio through a speaker — you’re streaming bytes back to a caller or a browser. Here’s the pattern for an ASP.NET Core minimal API endpoint that returns synthesized speech as a stream:
1 2 3 4 5 6 7 8 9 10 11 12 13 14 15 16 17 18 19 20 21 22 23 24 25 26 27 28 29 30 31 |
using Microsoft.CognitiveServices.Speech; using Microsoft.CognitiveServices.Speech.Audio; var builder = WebApplication.CreateBuilder(args); var app = builder.Build(); app.MapPost("/speak", async (SpeakRequest request, IConfiguration config) => { var speechConfig = SpeechConfig.FromSubscription( config["Speech:Key"], config["Speech:Region"]); speechConfig.SpeechSynthesisVoiceName = "en-US-Ava:MAIVoice2FlashNeural"; speechConfig.SetSpeechSynthesisOutputFormat( SpeechSynthesisOutputFormat.Audio24Khz96KBitRateMonoMp3); // No audio config = in-memory result instead of playing to a device using var synthesizer = new SpeechSynthesizer(speechConfig, null); using var result = await synthesizer.SpeakTextAsync(request.Text); if (result.Reason != ResultReason.SynthesizingAudioCompleted) { var cancellation = SpeechSynthesisCancellationDetails.FromResult(result); return Results.Problem($"Synthesis failed: {cancellation.ErrorDetails}"); } return Results.File(result.AudioData, "audio/mpeg"); }); app.Run(); record SpeakRequest(string Text); |
Call it with:
|
|
curl -X POST http://localhost:5000/speak \ -H "Content-Type: application/json" \ -d '{"text":"Your order has shipped and will arrive Thursday."}' \ --output response.mp3 |
That is the shape of the endpoint sitting behind a real call center agent or IVR system — take text, return audio, keep the round trip fast.
Using SSML for Turn-Level Control — What Actually Works
Microsoft’s own materials describe MAI-Voice-2 Flash as supporting “turn-level control over tone, delivery, and emotion.” The obvious first move for anyone who’s used Azure Speech before is to reach for the classic mstts:express-as element — the same one you’d use with a standard Neural voice to say “make this line sound cheerful” or “empathetic.”
I tried it. It doesn’t work.
Here’s the SSML I first attempted, styled the same way you’d write it for any legacy Neural voice:
|
|
// ⚠️ THIS DOES NOT WORK ON MAI-VOICE-2-FLASH — kept here so you don't waste // the 20 minutes I did trying to debug a namespace typo that wasn't the problem. var ssmlBroken = """ <speak version="1.0" xmlns="http://www.w3.org/2001/10/synthesis" xml:lang="en-US"> <voice name="en-US-Ava:MAIVoice2FlashNeural"> <mstts:express-as style="empathetic" xmlns:mstts="https://www.w3.org/2001/mstts"> I'm sorry to hear your order arrived damaged. </mstts:express-as> </voice> </speak> """; using var ssmlResult = await synthesizer.SpeakSsmlAsync(ssmlBroken); // result.Reason == ResultReason.Canceled // cancellation.ErrorCode == invalid_request |
So what does “turn-level control over tone, delivery, and emotion” actually mean today? As of this public preview, it’s unclear. It may be a plain-text delivery cue baked into the prompt, or an MAI-specific SSML extension that isn’t documented yet. I could not find a combination that worked, and I’d treat that marketing line as aspirational until Microsoft publishes the actual mechanism.
What Does Work: Plain SSML for Voice, Pacing, and Pauses
Strip out express-as entirely and SSML still earns its place — you get voice selection, break for natural pauses, and prosody control, all of which the service accepts without complaint:
|
|
var ssml = """ <speak version="1.0" xmlns="http://www.w3.org/2001/10/synthesis" xml:lang="en-US"> <voice name="en-US-Ava:MAIVoice2FlashNeural"> I'm sorry to hear your order arrived damaged. <break time="300ms"/> Let's get that sorted out right away. </voice> </speak> """; using var ssmlResult = await synthesizer.SpeakSsmlAsync(ssml); |
No emotion tags, no style attribute — just the voice name and a deliberate pause between the apology and the resolution. That pause alone does more for how “human” the response feels than most developers expect. It’s a smaller toolkit than advertised, but it’s a toolkit that actually ships a ResultReason.SynthesizingAudioCompleted instead of a canceled request.
Same Pattern in Turkish
MAI-Voice-2 Flash’s multilingual support means the same working SSML structure carries across languages — change xml:lang, the voice name, and the text:
|
|
var ssmlTurkish = """ <speak version="1.0" xmlns="http://www.w3.org/2001/10/synthesis" xml:lang="tr-TR"> <voice name="tr-TR-Elif:MAI-Voice-2-Flash"> Siparişinizin hasarlı ulaştığını duyduğuma üzüldüm. Hemen bir iade işlemi başlatıyorum, birkaç saniye sürecek. </voice> </speak> """; using var ssmlResultTr = await synthesizer.SpeakSsmlAsync(ssmlTurkish); |
Translation for reference: “I’m sorry to hear your order arrived damaged. I’m starting a return right away — it will just take a few seconds.”
This is the actual payoff of a multilingual low-latency voice model for a call center: one codebase, one SpeakSsmlAsync call, and the only thing that changes per market is the xml:lang, the voice name, and the translated text. You’re not maintaining a separate TTS integration per region.
📝 Note: Voice names and available express-as styles for MAI-Voice-2 Flash are still being finalized during public preview. Check the Foundry model catalog or Speech Studio’s voice gallery for the exact identifiers available in your region — including Turkish — before shipping this to production.
Why Run It Through Azure Speech (Not a Separate Vendor)
If you’re already using Azure Speech for any part of your stack, this is close to a zero-integration-cost upgrade:
- Same SDK, same auth pattern — no new NuGet package beyond what you likely already have
- Enterprise reliability and scale — the infrastructure Azure Speech already runs on
- Same Responsible AI and governance guardrails as the rest of Foundry
- Regional deployment options to keep voice data processing where compliance requires it
For teams already invested in Azure Speech for STT or existing TTS voices, swapping in MAI-Voice-2 Flash for your latency-sensitive scenarios is a configuration change, not a rewrite.
Final Thoughts
MAI-Voice-2 Flash is a narrow, well-aimed release. It’s not trying to be the most expressive or highest-fidelity voice model Microsoft ships — that’s what MAI-Voice-2 is for. It’s optimized for the one metric that actually breaks real-time voice experiences: the gap between “user stops talking” and “assistant starts responding.”
If you’re building or maintaining call center agents, IVR systems, or conversational assistants, and users have ever complained about the pause before the response — this is worth a pilot. Point it at your existing Azure Speech integration, swap the voice name, and measure the round-trip time yourself.
If your team already runs on Azure Speech and just wants faster responses without switching vendors, this is one worth wiring in this week. 🙂
Resources