Taswar Bhatti
The synonyms of software simplicity
Redis

Continuing on with our Redis for .NET Developer, the Redis String Datatype is also used to store integers, float and other utility commands to manipulate strings.

Redis String Datatype using Integers

In Redis float and integers are represented by string. Redis parses the string value as an integer and the neat thing about them is when you do operations on strings they are atomic. When there are multiple clients issuing INCR against the same key, it will never enter into a race condition.

  • INCR key : Increment the value by one O(1)
  • INCRBY key value: Increments the value by the given value (integer) O(1)
  • DECR key: Decrements the value by one O(1)
  • DECRBY key value: Decrements the value by the given value (integer) O(1)
  • APPEND key value: Concatenate the existing integer with the new integer O(1)
  • INCRBYFLOAT key value : Increment the float value by given value (float) O(1)

C# Code using integer and float

For source code please visit
https://github.com/taswar/RedisForNetDevelopers/tree/master/3.RedisStringsAsInt

For our next blog post, I will cover more functionality and other datatype in Redis.

For previous Redis topics

  1. Intro to Redis for .NET Developers
  2. Redis for .NET Developer – Connecting with C#
  3. Redis for .NET Developer – String Datatype
Redis

Continuing our series on Redis for .NET Developer, we will be looking into the basic string datatype that Redis provides. First to be clear, Redis is more than just a string cache or to store your serialized objects, it is a data structure server, but nevertheless the basic understanding of using strings in Redis will help us learn the foundation of using Redis.

Strings Data Type

String types are the basic data types in Redis. Strings in Redis can store integers, images, files, strings and serialized objects, since Redis strings are byte arrays that are binary safe and have a maximum size of 512MB.

Sets and Gets

The getters and setters are the basic commands that one can use to set or get values in Redis. For single key-value there are GET, SET, SETNX, GETSET

  • GET key: This key gets the value O(1)
  • SET key “value”: This key sets a value for a key O(1)
  • SETNX key “value”: If key does Not eXist this will sets a value against it O(1)
  • GETSET key “value”: Get the old value and sets a new value O(1)

For multi key-value there are MGET, MSET, MSETNX

  • MGET key1 key2: Gets all the corresponding values of keys O(N)
  • MSET key1 “value1” key2 “value2”: Atomic operation, so all given keys are set at once O(N)
  • MSETNX key1 “value1” key2 “value2”: Sets the given keys to their respective values if Not eXist O(N)

Example of using single key-value in C#

Below is an example of single key-value using C# StackExchange.Redis

Example of using multiple key-value in C#

Below is an example of multi key-value using C# StackExchange.Redis

Serialization of objects into Redis with C#

One can use Json.NET serialization of a C# object into Redis. There is also a StackExchange.Redis.Extensions Nuget package that allows one to serialize objects with protobuf, jil, etc. For more details please look at https://github.com/imperugo/StackExchange.Redis.Extensions.
In the example below we will Newton.Json to serialize a User C# object

For our next blog post, I will cover other functionality that the string datatype has in Redis, and also how Redis can treat strings as integer also.

For source code please visit
https://github.com/taswar/RedisForNetDevelopers/tree/master/2.RedisString

For previous Redis topics

  1. Intro to Redis for .NET Developers
  2. Redis for .NET Developer – Connecting with C#
Redis

In the second blog post series “Redis for .NET Developer” I will show how we will use C# to connect to Redis.
If you want to learn how to install Redis, visit my previous post on Intro to Redis for .NET Developers – Installing Redis on Windows.
We will be using StackExchange.Redis library to connect to Redis. One can download StackExchange. Redis through NuGet.

Dotnetcore Sample
I have added sample code for Dotnet Core also below
StackExchange.Redis is a high performance general purpose redis client for .NET languages (C# etc).

For .NET Framework

1. Let’s Download our Nuget package, you can use the command line like below or use Visual Studio (I am using VS2018).

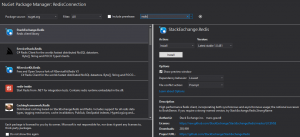
Search for redis in your nuget window.

Nuget Redis

Nuget Redis

Once installed you will see in your output windows.

Nuget Redis Result

Nuget Redis Result

Now that the nuget package is installed, we can build a C# console app that will connect to your redis server.
Below is a sample code to connect to localhost of your redis.

The above code will allow you to connect to Redis and store a string key “testKey” with a value of “testValue”.

For better modulation of Redis it is recommended to store ConnectionMultiplexer as a static singleton in your application.

Below is example of a RedisStore that stores the ConnectionMultiplexer as a static Lazy loaded singleton.

Now our previous code would something like

Dotnet Core Version for Connection

Lets go through the process of creating a dotnet core console application.

We will now need to install all the packages that we require to run dotnetcore with Redis.

We will create an appsettings.json file to store our connection information, that is one of the reason we have installed all those packages into our project.

I am running Redis on my localhost on Docker

This is how my appsettings.json looks like, with only one key and value.

We also need to tell our csproj about the output of the json file by modifying our RedisConnectionDotNetCore.csproj, we will add into our ItemGroup

Lets modify our code in RedisStore.cs such that it can read from the json file, as you can see most of the code remains the same except for where we pick our configuration from.

Our Program.cs remains the same

Now we can run with dotnet command line

In my next blog post I will cover the data structures that Redis provides.

For code please visit https://github.com/taswar/RedisForNetDevelopers

For previous Redis topics
  1. Intro to Redis for .NET Developers
Redis

What is Redis – Installing Redis on Windows

Redis (REmote DIctionay Server) is a very popular open-source, networked, in-memory, key-value data store, sometimes referred to as a data structure server which also comes with optional durability. Redis is well known for high performance, flexibility, provides a rich set of data structures, and a simple straightforward API. The programming language Redis is written in is ANSI C.

The development of Redis has been sponsored by Pivotal since May 2013; before that, it was sponsored by VMware. According to the monthly ranking by DB-Engines.com, Redis is the most popular key-value store. Redis officially runs on Linux and not officially supported on Windows but MS Open Tech has been working with the Redis community to build a production-ready Windows port of Redis, including 64-bit support, an installer for Windows Azure, NuGet support, and much more.

In this series of post I will introduce Redis and it basic functionality using C# and node.js sample code.

To start off lets try to get Redis running on our Windows machine first. We will need to download the MSI from MS Open Tech, the latest version provided by MSOpenTech is 3.2.100 released in 2016.

This is an old version of Redis, I would not suggest installing Redis this way. The recommended way is to use Docker or use the Windows Subsystem for Linux Ubuntu environment

Windows Installation

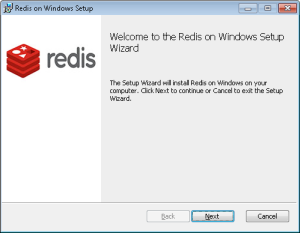
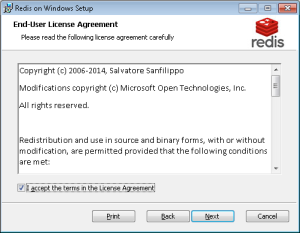
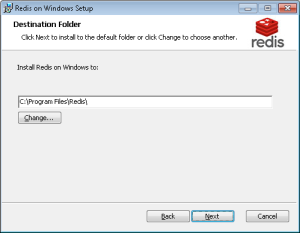
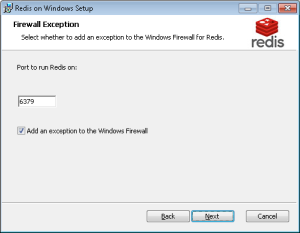
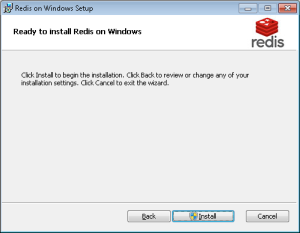
Launch the msi and follow through the process of the install. Screenshot are attached below:

Linux Install

If you wish to run the latest version 5.0.3 of redis then you will need to install it on a Linux system. The following commands shows how to install redis on a Linux System (Ubunutu)

Ubuntu on Windows Install

There is also another option of installing on your windows machine that is using Windows Subsystem for Linux. One can run Ubuntu on Windows 10 as a subsystem. In order to enable Linux on Windows 10 you will need to run these commands first.

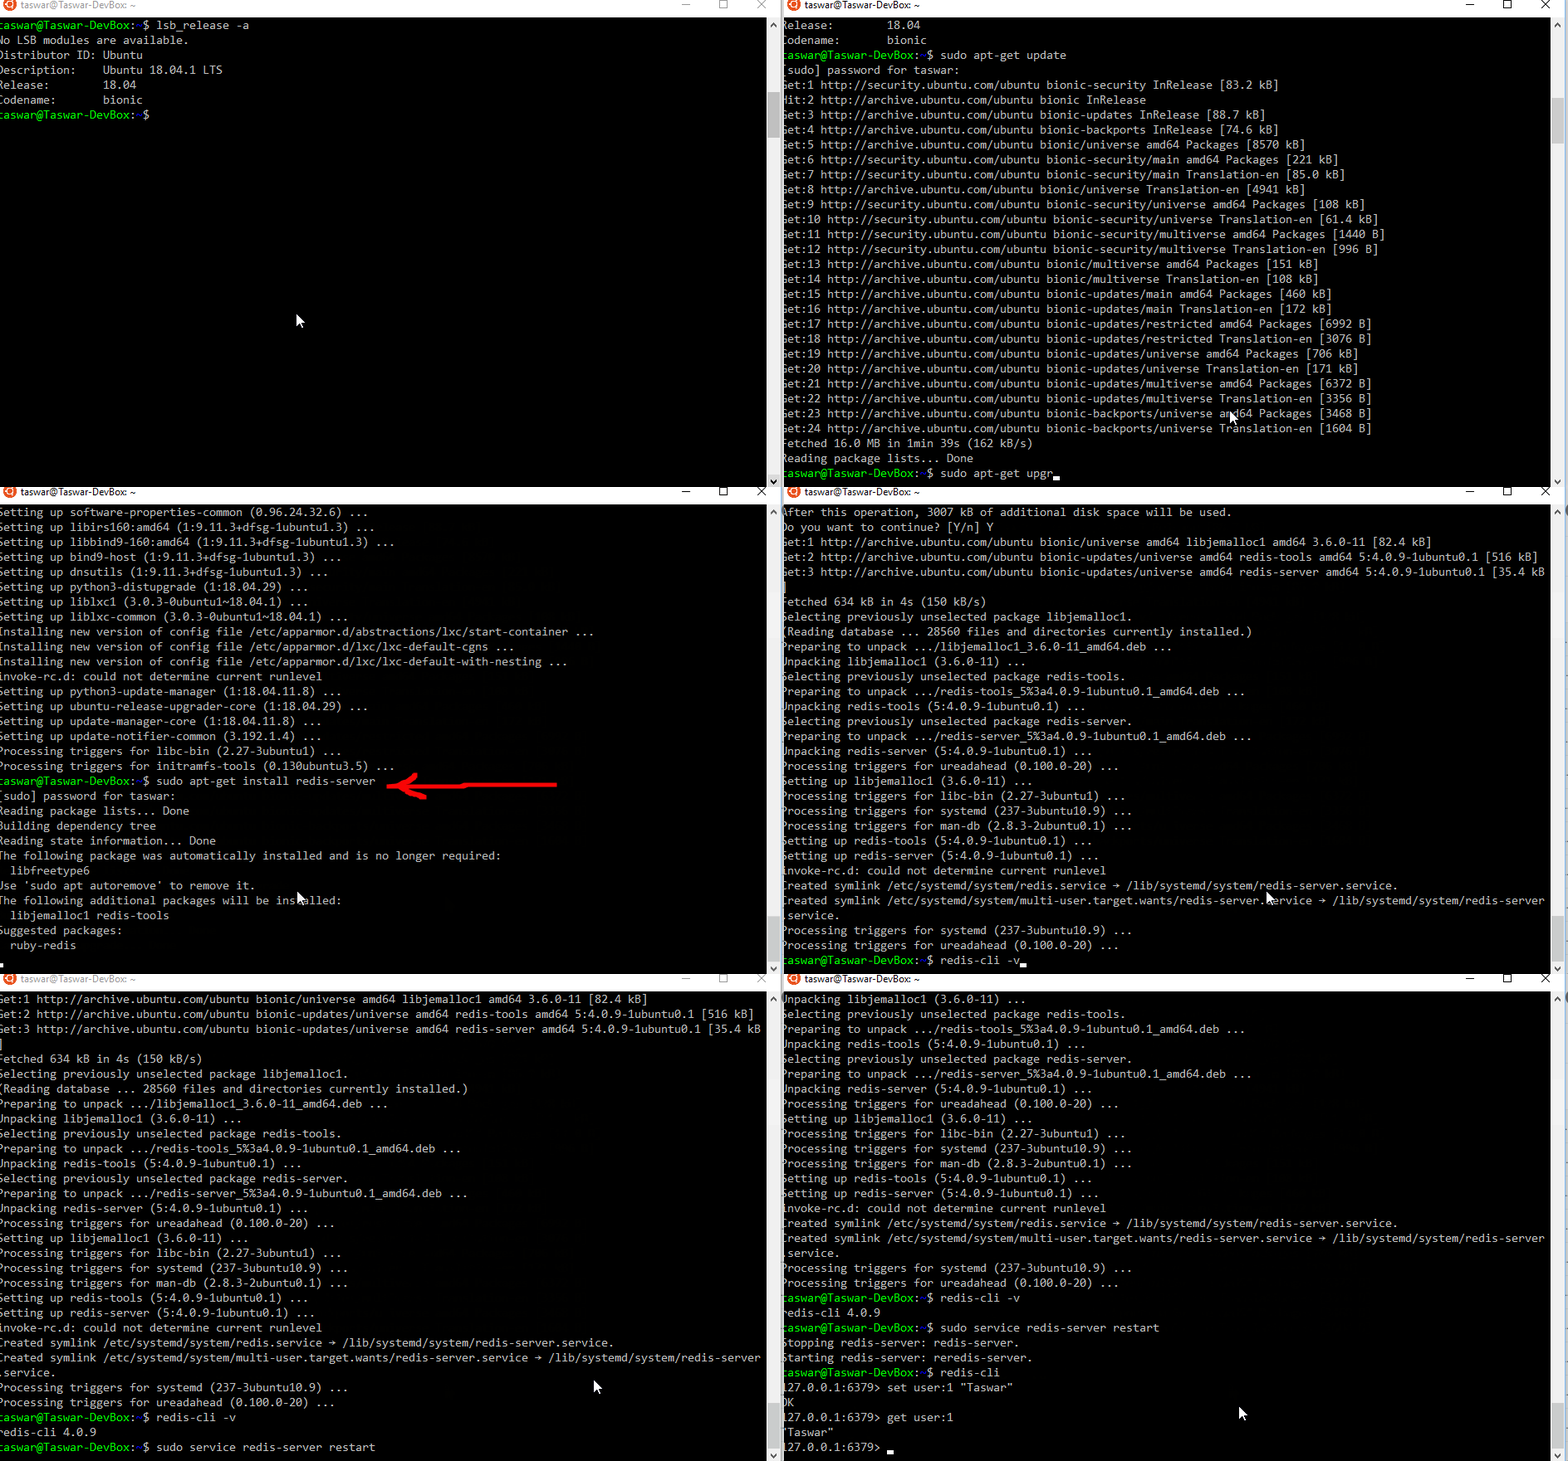
Then you can download the Ubuntu version you wish on the Windows Store. Next you can install Redis by launching the ubuntu prompt, the steps are listed below.

install-redis-windows-ubuntu

install-redis-windows-ubuntu

Validating installation

Once installed on windows or linux we can use the redis-cli to verify if redis is running.
On windows launch your prompt and go to C:\Program Files\Redis
run redis-cli.exe and if you are on Linux just simply run redis-cli

Run these commands, to set and get values

The end result should look something like this.

Redis Prompt

Redis Prompt

If you are having issues with connecting to redis, check out if redis is running, use the redis-server.exe to verify.

Summary

We have learned how to install redis in part 1 series of Redis for .NET Developers. in the upcoming post, I will go through the more details of redis.

idea

Dear Readers,

I am looking to write on some topics but have not decided on which one would be the best, I wanted your input on what you as reader would like to be covered. I have google survey below, please select one of the topics or if you like other topics to be covered please fill in the other section.

Thanks.
Taswar

Grunt

Sorry for not blogging for a while, have been busy with joining a new company. I wanted to finish up the blog post series with Running Grunt to test your JavaScript application.

In this post I will cover using Jasmine and Phantom.js. I have been a big fan of phantomjs a headless browser to test your web, its super fast and lightweight. In fact I did a local (Ottawa) JavaScript talk on it in 2012.

Jasmine

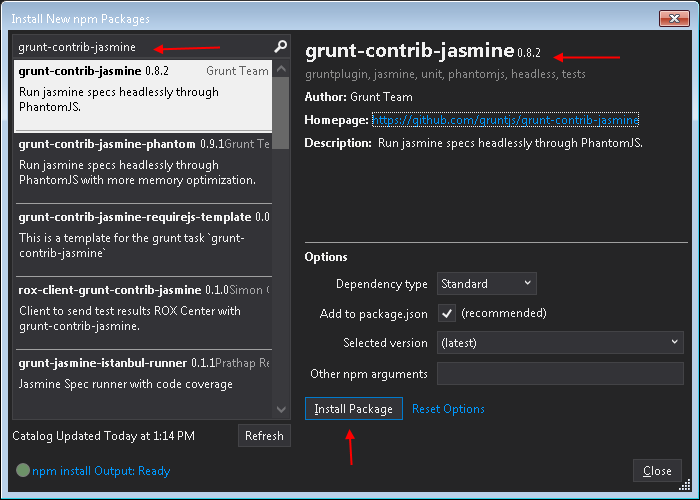
Jasmine is a BDD test framework for Javascript, we will be using to to test our app. Let’s get started and install jasmine to use in our express 4 application, again we will use npm or visual studio npm installer to install it.

npmjasmine

Jasmine npm install

Next we will write a simple JavaScript client code, let’s call it client.js script that we will perform the test on.

We will now add an spec file for it to test the JavaScript client.js file we just created.

The spec file is where we define our test, now that we have created the spec we can add our grunt task

We can now run our grunt task using Task Runner or by command line

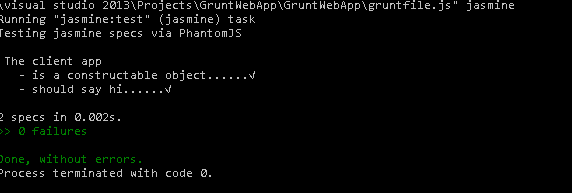
The output would be something like

grunt jasmine output

grunt jasmine output

Now that we have Jasmine and grunt working, lets create a JQuery plugin so that we can test Jasmine with JQuery.
In order to do so we need to use bower. If you need a tutorial on bower you can look at my old post.
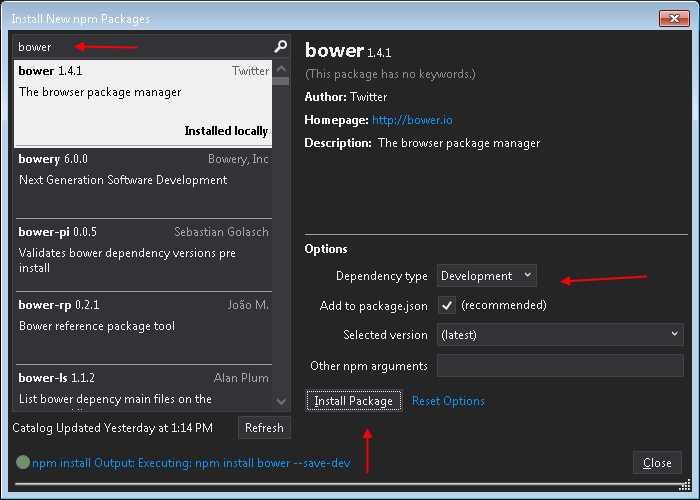
But first lets install bower using npm or by the npm tool in Visual Studio

Bower NPM Install

Bower NPM Install

Let’s now use bower to install jquery, jasmine-jquery plugin and we will save it to our dev environment.

I will reuse one of my plugin for jquery that I created that does locale sorting. The code base is small enough for us to test, since it sorts elements based on locale of the text. Lets place the file in our javascript folder so that Grunt can pick it up, lets call it localeSort.js

We also need to let our Gruntfile to know about our “vendor” jasmine and jquery plugin, in order to run the task.

We will also create a spec file and created a folder called fixtures and placed a html file sampleSort.html in there which contains a unordered list with fruit names, please look at jsfiddle for input

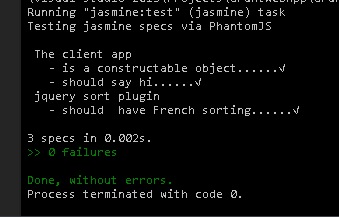
The result of our jasmine test would show.

Jamine Jquery Test

Jasmine Jquery Test

Summary

So this concludes our Grunt series, we have gone through the journey of using Grunt with Visual Studio, here were all the topics that were covered. Hope you enjoyed it.

  1. Using Grunt – The Javascript task runner
  2. Using Grunt – Visual Studio Grunt Launcher
  3. Using Grunt – Visual Studio 2013 Task Runner Explorer
  4. Using Grunt – Basic Tutorial
  5. Using Grunt – Copying Files
  6. Using Grunt – less and css minifcation
  7. Using Grunt – Javascript Uglify and Concat
RR Donnelley

Yesterday, was the last day at RR Donnelley Language Solutions for me, it was great working with an excellent team at RR Donnelley, but the time has come after 5 years working in Language Solutions to move and advance my career.
I will be moving to a new position as System Architect and be working on Security related software. I am excited and also expecting challenging time ahead. I will be still be blogging more on Node/JavaScript/MS .NET and will probably include more Security, Authentication, Performance related articles, so stay tuned.

Grunt

Using Grunt JavaScript Minification

We will continue from our last blog post on Grunt: using less and css minification to JavaScript minification using a plugin called Uglify.

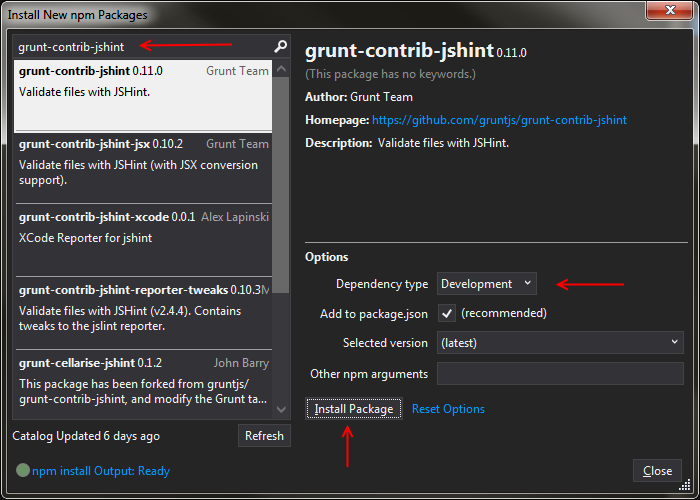
JSHint

To begin we will use a linting tool called jshint, to help us in taming our JavaScript with some static code analysis to flags suspicious usage.

We can use the command line npm install for it or we can use the visual studio tool to install

Npm JsHint

Npm JsHint

Now that we have jshint lets add our grunt task for jshint in our Gruntfile.js

You may realize that something different in our jshint section, there are some ** inside the file name. The pattern of /**/ basically mean traverse through all the children levels of the directory hierarchy, and the *.js means all the file with extension of js. By doing so, our script will always scan through any subdirectory for any future js files we may add.

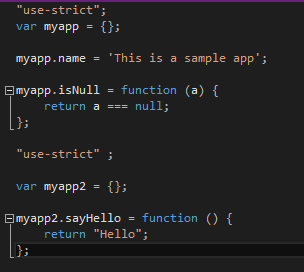
Lets add a file inside of public/javascripts/ directory and call it myapp.js, our file will look something like this.

When we run our task using TaskRunner in Visual Studio or command line for jshint, we will get back a fail task and some suggestion on our JavaScript.

In order to fix the script jshint already suggest us to use the “===” for compare. Let’s now add another file called myapp2.js and also fix our myapp.js file.

When we rerun our task we should have no more errors.

Concat

We will now like to concat the file together and there is yet another plugin for grunt to concat files for us grunt-contrib-concat, as always we can use the npm tool in visual studio or the command line to install it.

And in our Gruntfile.js we will add our concat task

From the script we will see that it will add the bundle.js file into the deploy directory.

bundle.js

bundle.js

and if we open the file, we will see that both scripts are combined into one file.

concat

concat

Uglify

Lastly, we would like to uglify the file, as in minification of the Javascript files. As always we will install our plugin and modify our Gruntfile.

Our new Gruntfile.js would look like

uglify

uglify

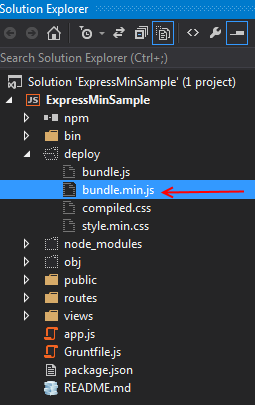
And now our bundle.min.js file is a minified javascript file (Uglified).

minified

minified

Summary

In this post we covered quite an area of grunt where we used multiple plugins to accomplish javascript related task (minification, concat, etc), in the next post we use grunt to automate our testing and clean up task.

Grunt

In this post I will go through using grunt for our css minification task and also showcase another preprocessor for css called less.

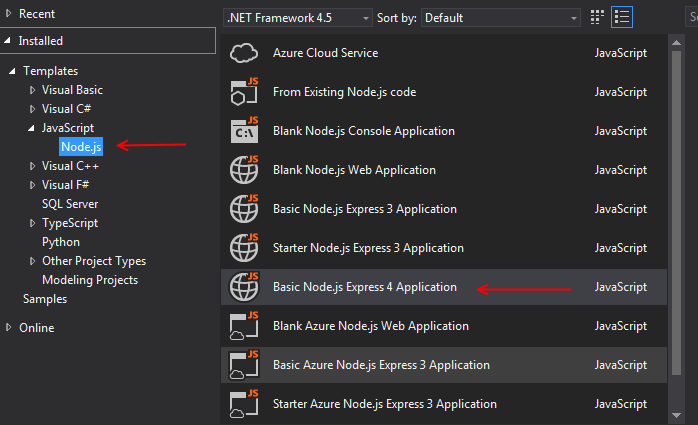
First off lets start with a express 4 application, we will create it with Visual Studio NTVS, the latest RC contains a template for express 4.

Node Express App Visual Studio

Node Express App Visual Studio

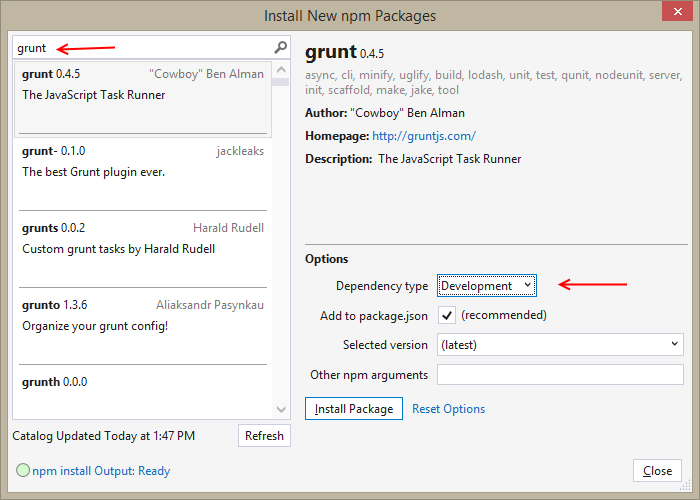
We can install grunt by command prompt npm install

or by using the npm installer in Visual Studio, remember to choose the development dependency type

Npm Installer

Npm Installer

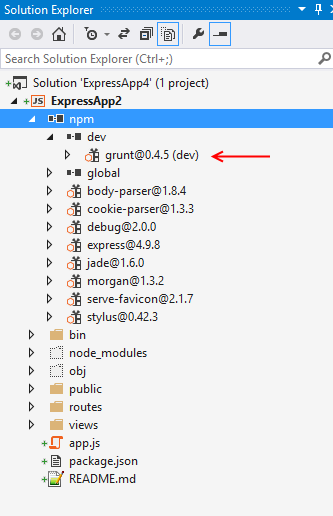
We should now see grunt in our dev when we expand the npm icon in Visual Studio

Grunt Visual Studio

Grunt Visual Studio

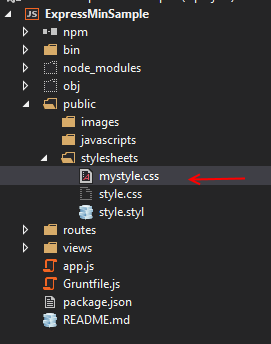
In our express 4 application we will now add a mystyle.css file to public/stylesheets folder like below.

Css file added

Css file added

The css contains just 3 styles

What we want our grunt task to do, is to minify this css for us in our deployment folder, so that it is deploying mystyle.min.css, in order to do so we can use the grunt-contrib-cssmin

Lets first install with npm, again you can use the visual installer if you prefer in visual studio.

Now in our grunt task we can load the npm and also call the cssmin in the initConfig object.

One thing to note is that in cssmin, in the files enclosure one has to put the destination, following the source file.

Let’s try to improve this css a bit by introducing less, basically less is a preprocessor that allows us to write cleaner css. We can introduce variables inside of less so that we don’t have to repeat ourselves. There is more to less and I will not get into the details of it. If you wish to learn more about less go to http://lesscss.org/

We would now need grunt-contrib-less installed with npm and load it into our grunt file.

Our grunt file would look like

But what if we wanted to combine these 2 files, and also to minify them? Then you have to wait till the next blog post, stay tuned.

Grunt

Sorry for not posting regularly here, I was on holidays during late December till January, so didn’t get the time or the change to blog, but will get back to the routine of blogging more often.

This blog post will be the continuation on Using Grunt. We went through some basic of using Grunt, in this post I will cover copy of files using grunt. One can definitely use their system commands (cp, mv, del, rm, etc) to copy files but having the task runner to automate it for you, will make the mundane task of copy easier and not to mention portable to other platform.

In our example we will start off with a simple node express app and we wish to copy the html files to build folder.
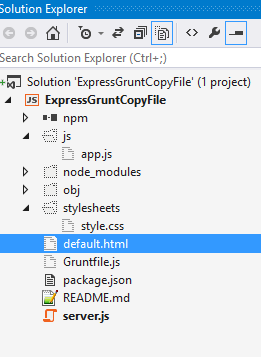
Our file structure may look somewhat like:

GruntCopySolution

GruntCopySolution

We will now focus on the Gruntfile.js, as some of you may recall a simple grunt file looks somewhat like

We will be using the grunt-contrib-copy plugin for copying files, the reason we will use grunt to copy files is because it will abstract away the system calls of copy from us, so that we can use the same script in windows, mac or in linux.
To install grunt-contrib-copy, we will use the npm command and save it in our dev

We will now add the copy information and load the npm in our gruntfile.

We can run the grunt command of copy with html, this will also create the build folder for us

One can also use the build task to run the copy command, note: I am passing the copy:html as an array to the second parameter in our gruntfile, I can continue adding task to the array e.g copy:somedir, etc, etc

We may also want to copy some of our bower component file over to the build, we can add another config object to grunt copy like below (If you are interested in learning Bower please read my other post on Bower)

Grunt has a lot of plugin that can help us do a tone of things, in the next post we will go over some plugins that will help us minify css, JavaScript and even contact files for us.

UA-4524639-2