Taswar Bhatti
The synonyms of software simplicity
aws-iam

I hope you have read the first part covered on how to protect your root account with MFA. In this post we will continue on and protect our AWS account by creating individual IAM users.

Create individual IAM users

We can now move to creating individual IAM users section
AWS-IAM-Create-individual-IAM-users

Create individual IAM users

Now we can expand the section and click on Manage Users
AWS-IAM-Create-individual-IAM-manage-users

Create individual IAM Manage users

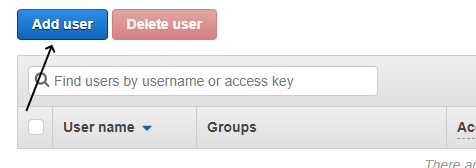
Once inside the section click on Add User
AWS-IAM-AddUser

AWS IAM Add User

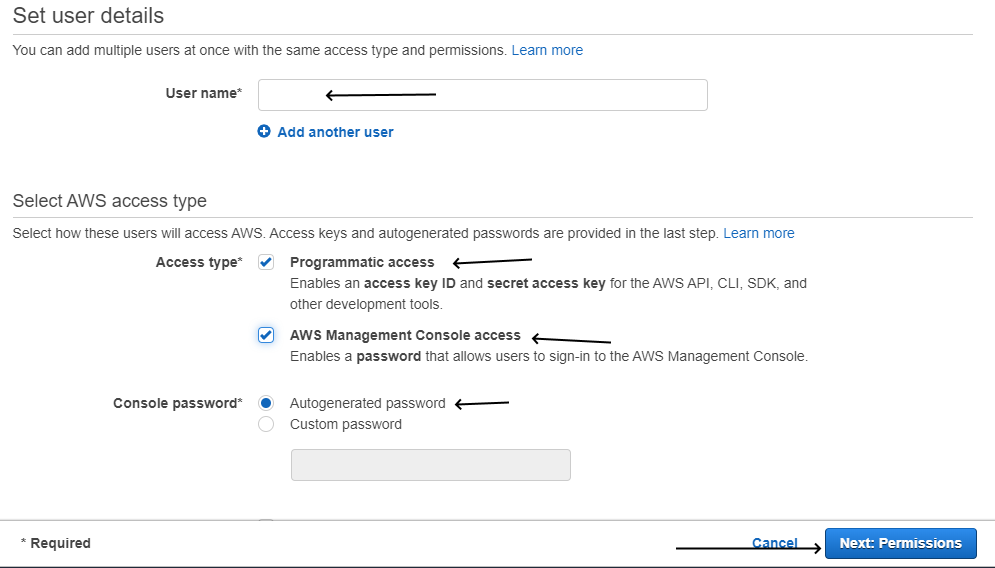
Type the user name, set access type and auto generate password. Remember to require password reset to be more secure.
AWS-IAM-Set-User-Details

AWS-IAM-Set-User-Details

AWS-IAM-Require_Password_Reset

Require Password Reset

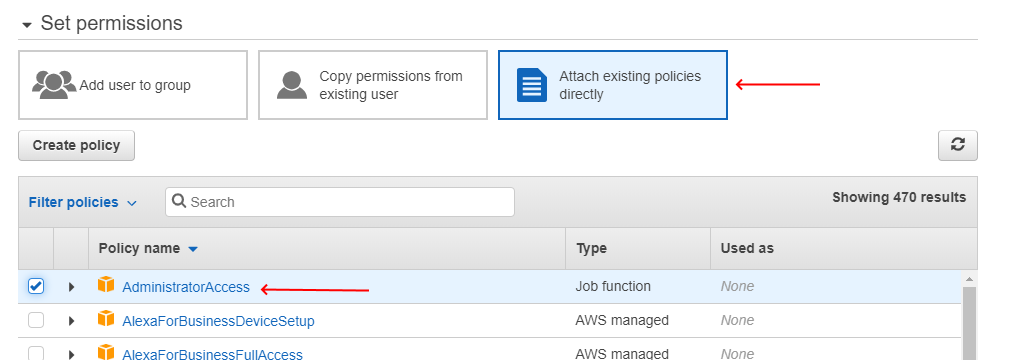
Set the permissions to the user, I have clicked on attach existing policies directly and have selected Admin access for my user.
IAM-User-Set-Permissions

User Set Permissions

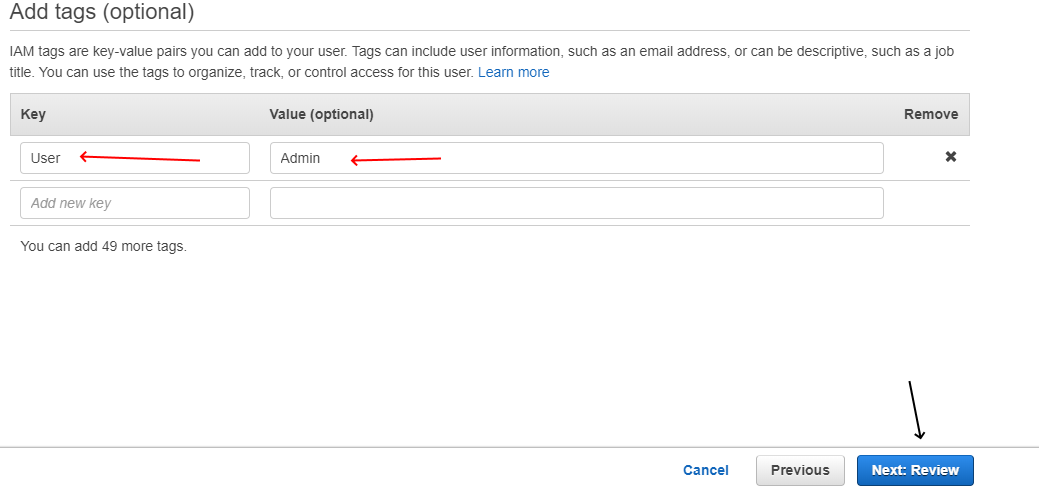
You can then add tags if you want it is optional. I have added User with Admin as tag like below.
AWS-IAM-Add-User-Tags

Add User Tags

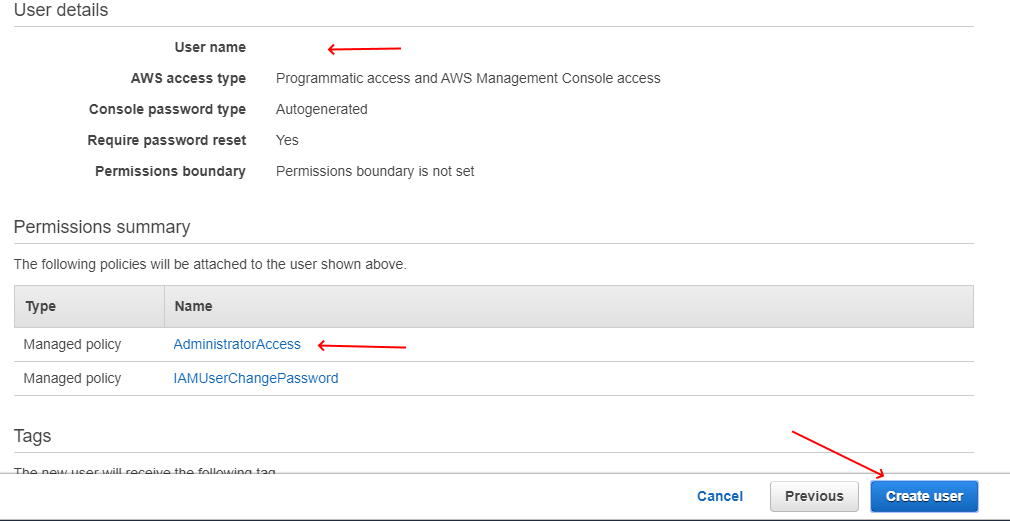
You can then review the user and click on Create User
AWS-IAM-Review_User-Details

Review User Details

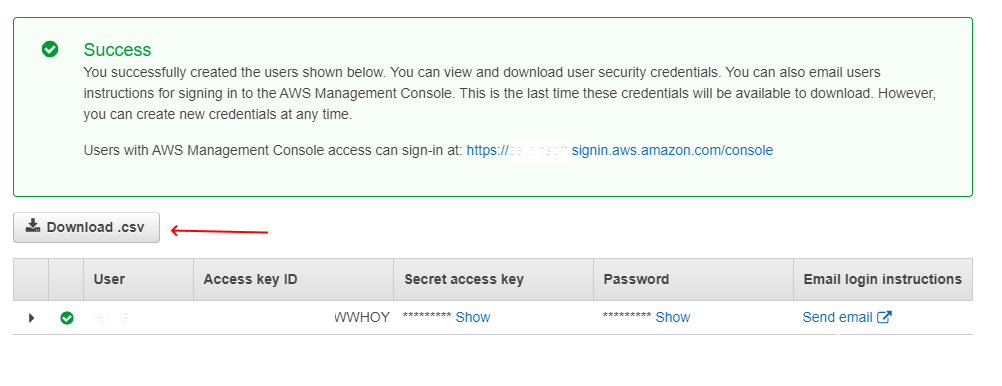
Your user will be create, remember to download the csv file or email the user with their temporary creds
AWS-IAM-User-Created

User Created

Summary

Here are the steps to create individual users in AWS using their IAM. Next section we will cover how to creaet groups so assign to the user we just created

aws-iam

In this post I wanted to cover how to Activate U2F Fido Keys for AWS root account.

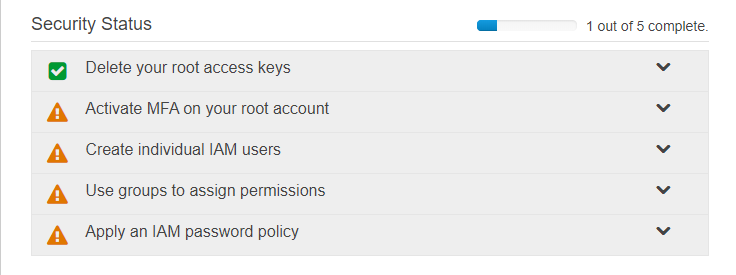
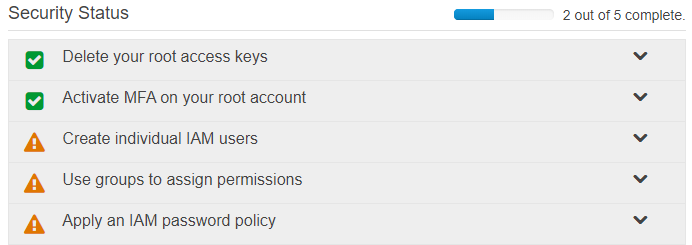
After logging if you click on IAM you will see the dashboard like below where 4 steps are not yet complete. We will complete those first steps and other post will cover the other steps such that we can have better security in our AWS account.

Activate MFA on your root account

AWS Security Status

We will now expand the second step and activate MFA
AWSActiveMFA

AWS Active MFA

Then you will be prompted for Security Creditials and click on it
AWSActiveMFAContineSecurityCreds

Continue Security Credentials

Choose the MFA Tab and click on Active MFA
AWSActiveMFA-IAMDashboard

AWS Active MFA IAM Dashboard

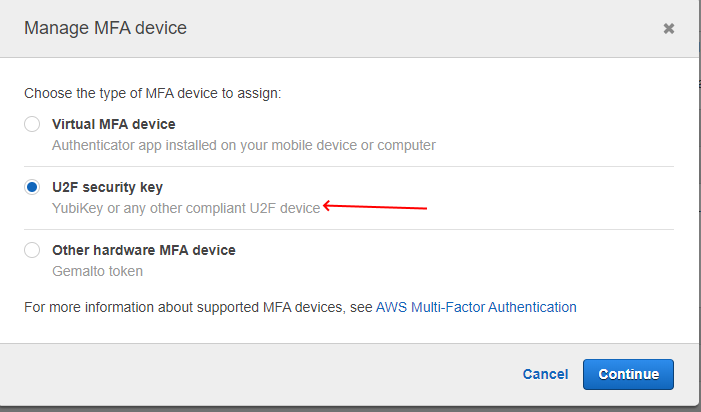
I will use the U2F Yubikey option to activate my root account
AWSActiveMFA-U2F

Active MFA U2F

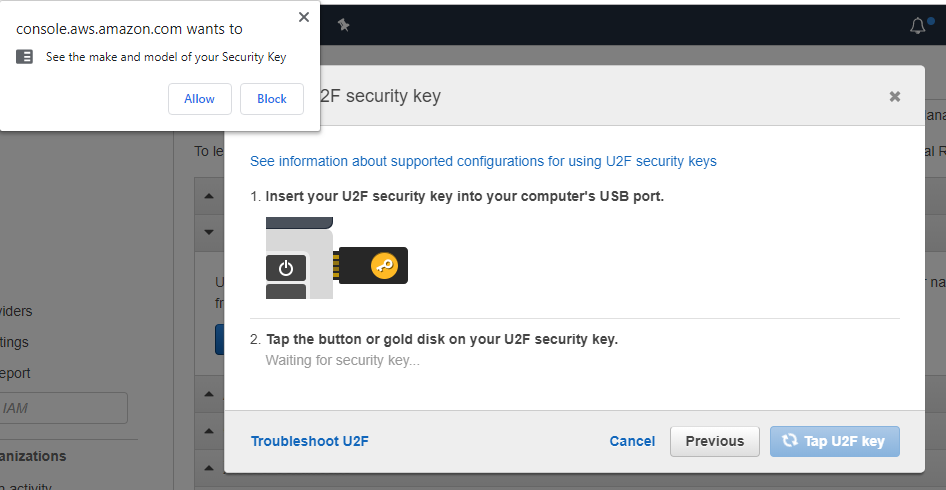
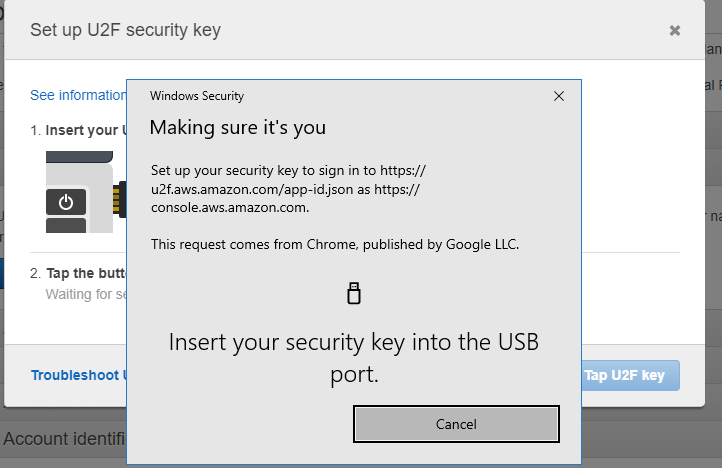
This will prompt for allowing the browser to access your key and since I am on windows it will also prompt for a non browser based prompt to allow it, once you plug in your yubikey then you can click the key icon.
YubiKey

YubiKey

Aws-prompt-u2f

Aws prompt u2f brower allow prompt

Aws-prompt-u2f-step2

Aws prompt u2f windows prompt

Now your Admin account that was used for creating the AWS account is using U2F for authentication
AWS-Setup-U2F-Complete

AWS Setup U2F Complete

Summary

I hope this has helped in setting up U2F with your FIDO token to protect the root account, in other post we will cover the other 3 steps.

Azure Cost Budget

I have covered how to do Cost Budget in AWS, I thought I can also do one for Azure of how to have a budget in Azure with Cost Budget.

Step by Step – How to create a Cost Budget in Azure

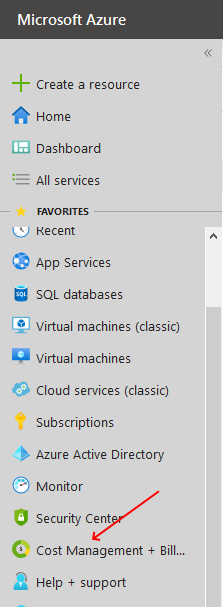
First login to your azure portal, and click on Cost Management and Billing in the menu.

CostManagementBillingAzure

Cost Management Billing Azure

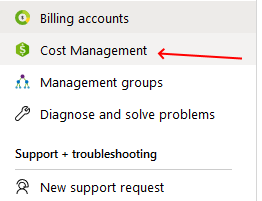
Then click on the Cost Management.
CostManagement

Cost Management

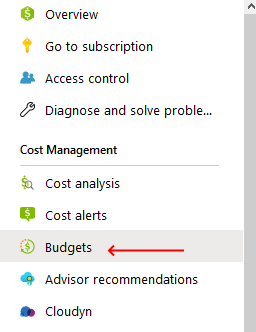
Once inside the section, click on Budgets
BudgetsAzure

Budgets Azure

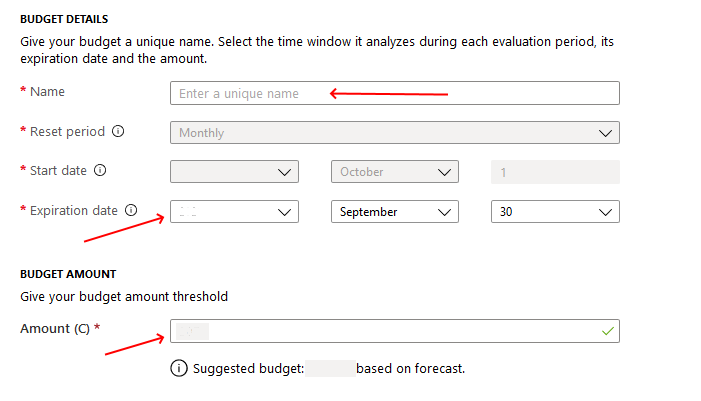
Once in Budget, click on Add and fill out the section with a name, the end date and the amount of budget
BudgetDetailsAzure

Budget Details Azure

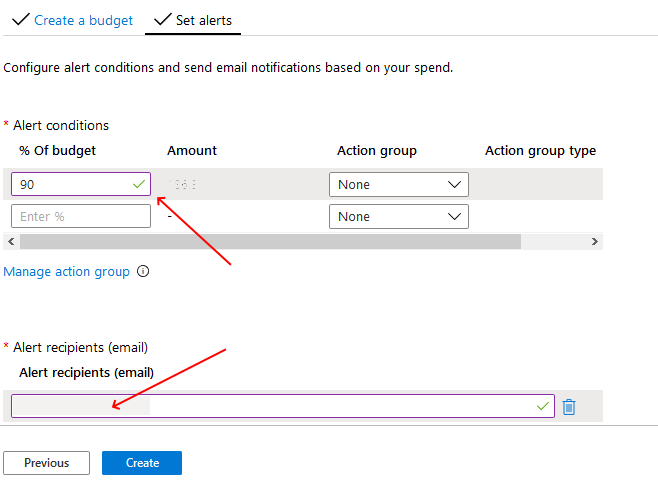
Then click on next will bring you to your Alert section, fill out the percentage that you want to alert on, I have filled out 90% and also the email to notify on
SetBudgetAlertsAzure

Set Budget Alerts Azure

Click on Create and you will now have a budget for spending on Azure
BudgetAzureSummary

Budget Azure Summary

Summary

I hope this helped, there is also Action Groups that you can use to delete VM or other functionality when a certain limit has been reached, that can be done on the Alert page.

Taswar-Bhatti-Austin-Texas-NodeJS-Meetup-May-2019

I had a work workshop to attend in Austin Texas and though it would be fun to speak at a meetup group on Using Hashicorp Vault for your NodeJS. I tired the Microsoft group first but was not successful due to their schedule and mine. Fortunate for me the Austin NodeJS Meetup was perfect with my schedule, plus it was right in downtown (Near dirty six). I was able to speak on one of my favorite security topic on using Vault for your nodejs application. Again thanks to Matt Walters and Proof Technologies to organizing the meetup and free pizza.
Here is the link to the meetup if you are in Austin definitely check the out, a nice crowd to join. https://www.meetup.com/austinnodejs/events/srwjzqyzhbtb/

There was also a recording or live stream, uploaded to my youtube if you are interested.

Slides of Austin Meetup

For anyone starting new on Amazon they might want to start with a small aws budget on a their free trial to learn amazon. Even if you are a small to large company you will want to have a budget for your cloud services.
Amazon provides an easy way to alert and to create a budget for your cloud.
Lets get started on how to create a budget

Step by Step – How to create a AWS Budget in Amazon Web Services

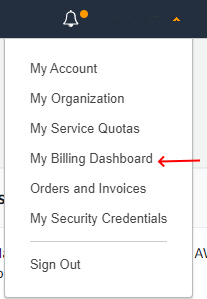
First login to amazon console and then click on my account and you will see My Billing Dashboard in the drop down like below.

My Billing Dashboard Menu

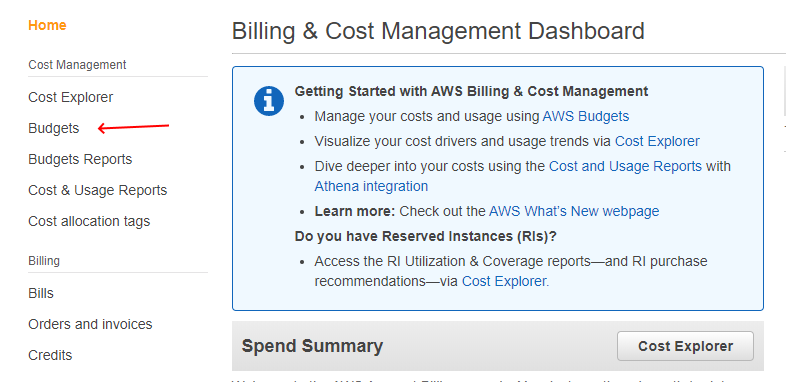
Once inside the page, on the left hand you will see the menu for the section, click on budget.
aws-my-billing-budget-menu

aws-my-billing-budget-menu

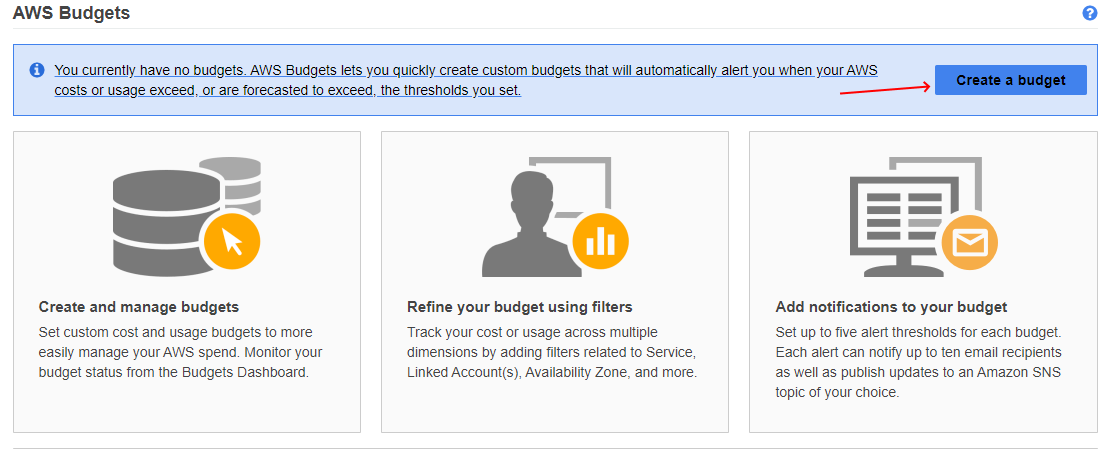
Then click on the Create a Budget blue button.
aws-budgets

create aws budgets

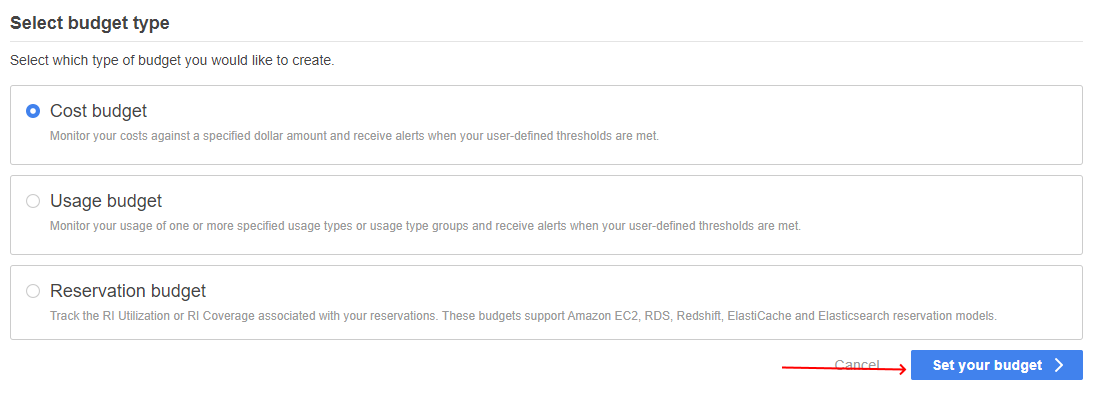
I will create a cost budget so I have selected the cost budget and clicked on Set your budget
aws-cost-budget

aws-cost-budget

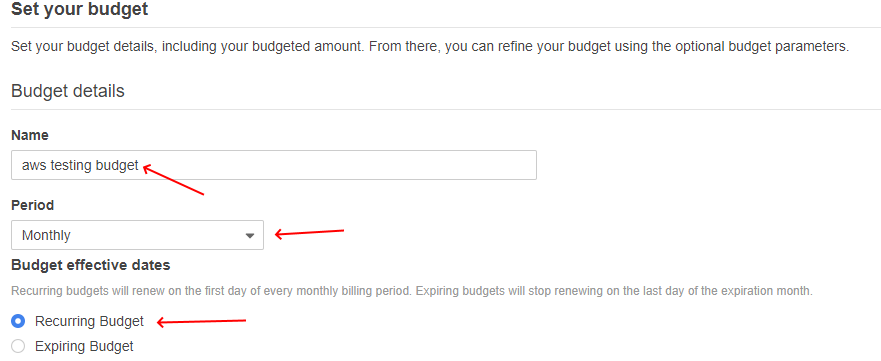
Then I have to set a name for the budget below I have set it as aws testing budget, it is set up as monthly and recurring.
aws-set-your-budget

aws-set-your-budget

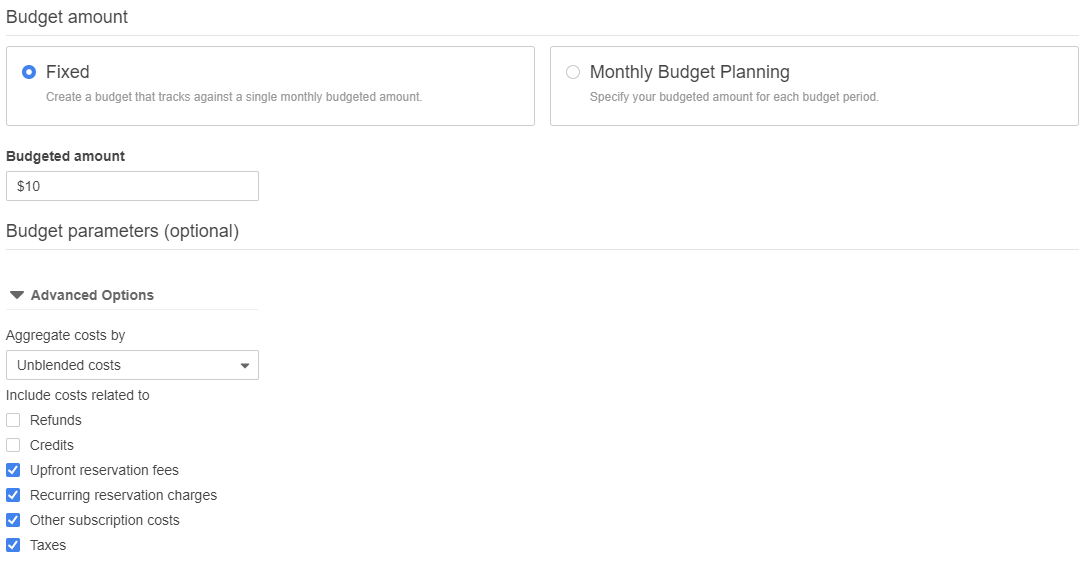
I have set it as a fixed budget with a 10 dollar limit.
aws-fixed-budget-amount

aws-fixed-budget-amount

Afterwards you can click on Configure Alerts to configure when to alert you when the budget is close to a certain percentage or amount
aws-config-budget-alerts

aws-config-budget-alerts

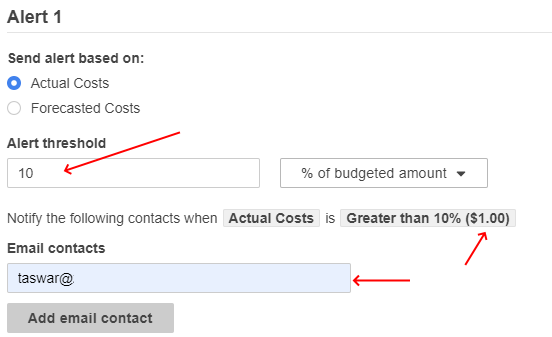
I have set up the alert to 10% of the amount which is just 1 dollar, so aws will notify me on the email provided below when I am at 1 dollar
aws-budget-alert

aws-budget-alert

It will then confirm your budget on a page and you can see the details in a table
aws-budget-table

aws-budget-table

Summary

I hope this helps you in setting up your budget in aws when you are trying out aws or when you want to set up a budget for your company.

Taswar_Bhatti_VS2019_With_Python

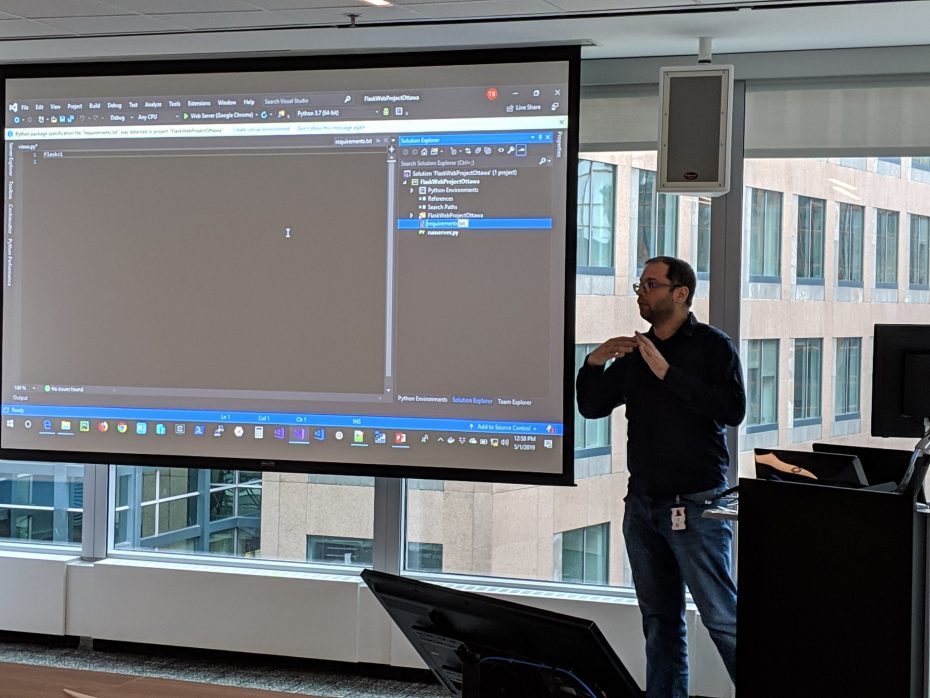
I had a talk on Getting productive with Python on Visual Studio 2019, at the Ottawa .NET User Group (https://www.meetup.com/ottawaitcommunity/events/259081628/). Thanks to all the people who came to the talk, I wish my demo worked properly unfortunately sometimes things just dont work 🙂

Nevertheless here are the slides for the talk.

8 Cloud Design Patterns Update Conference

Here is the youtube recording for my 8 Cloud Design Pattern you ought to know talk at update conference in Prague Nov 2018. Hope you like it.

Javascript

Thanks to the organizers of ForwardJS Ottawa to let me speak on Cloud Design Patterns using Nodejs, I had a great time at the conference for anyone who is looking for my sides there are located right below.
If anyone wants to view the demo code I showed please look at this blog post on using Promise in Nodejs for Retry Pattern.

retry-pattern-nodejs-with-promise

One of the easiest cloud design pattern that one can try out is the Retry Pattern. I wanted to show how to use an Retry Pattern in Node.js using Promise as a example. So what does the Retry Pattern achieves?

Problem Statement – What is the issue the pattern solves?

When building applications you always have some sort of outside/external service including another MicroService that you have to consume or call. Sometimes there could be momentary loss of network connectivity, or a temporary unavailability, or timeouts that occur when that service is busy. You may be calling a database or a restful service that may be busy and fail but if you try back again it will pass. These types of faults are usually self-correcting, and most of the time require some type of delay in calling it again, which will have a success response.

Retry Pattern

  • Enable an application to handle transient failures
  • When the applications tries to connect to a service or network resource
  • By transparently retrying a failed operation
  • Improves the stability of your application
  • Typical Application

    Below is a typical application diagram, where you a service or web app.

    TypicalApplication

    TypicalApplication

    But when the connection to the service fails we usually get an error on our application.

    TypicalApplication-Network-Failure

    Typical-Application-Network-Failure

    When to use Retry Pattern

    • Use retry for only transient failure that is more than likely to resolve themselves quickly
    • Match the retry policies with the application
    • Otherwise use the circuit break pattern

    When not to use Retry Pattern

    • Don’t cause a chain reaction to all components
    • For internal exceptions caused by business logic
    • Log all retry attempts to the service

    Sample Code

    Below is a sample in node.js that shows the usage using Promise in Node.js. The code tries to call https://httpbin.org/status/200,408 with a POST which gives us a status of 200 or 408 randomly. First, lets create our code and add the package fetch into it.

    Without Promise

    We will write a sample application that will call the the web service without retry to get 408 errors.

    I am just using a console logger but you should be using a proper logger when you do retry pattern.

    After couple of runs you will see it response back with 408 RequestTimeout

    Using Retry with Promise

    Now we will introduce the retry pattern with using Promise into our code with an incremental delay of 1 second to 3 seconds and lastly 9 seconds.

    Output

    Below you will see three runs of the application with sample output.

    Summary

    As you can see Retry Pattern is quite useful for transient and self correcting failure, not to mention it is quite simple to implement in NodeJS with the help of Promise.
update_conference_taswar_bhatti

Here is the youtube version of my presentation that I did in Prague at Update Conference. You can now watch my entire presentation. Thanks to Update Conference for doing such a fantastic job.
Enjoy.

UA-4524639-2