
When it comes to styling in Gatsby, it allows one to style with css, less, scss, etc. I wanted to keep things simple for the time being and will use css and just copy what I have for the header in my blog to see how it will look like in Gatsby. It will be a way to find out the amount of work it will require for me to just create the header layout of my blog.
Getting started
Let’s choose a clean template of Gatsby without any pages etc. Gatsby provides us with the hello-world template which is the minimal template. We will start the template by executing the command below.
|
1 2 |
$gatsby new myblog https://github.com/gatsbyjs/gatsby-starter-hello-world $cd myblog |
Gatsby provides us with a way to create global styling by adding the style reference file into gatsby-broswer.js. Lets create a global.css file and add the html and body css styles. We will create a folder in src/styles and also create a file called global.css inside of it.
|
1 2 |
mkdir src/styles touch src/styles/global.css |
Your folder will look like below in vscode.
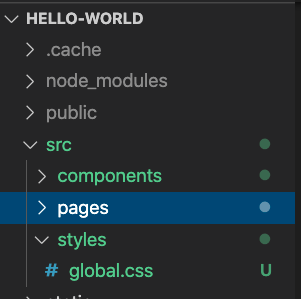
gatsby-styles-global
Below is the content of global.css, I copied the html and body styles into this file from my blog.
|
1 2 3 4 5 6 7 8 9 10 11 12 13 14 15 16 17 18 19 20 21 22 |
html { margin-top: 32px !important; overflow-x: hidden; } html, body, div, span, applet, object, iframe, h1, h2, h3, h4, h5, h6, p, blockquote, pre, a, abbr, acronym, address, big, cite, code, del, dfn, em, font, img, ins, kbd, q, s, samp, small, strike, strong, sub, sup, tt, var, b, u, i, center, dl, dt, dd, ol, ul, li, fieldset, form, label, legend, table, caption, tbody, tfoot, thead, tr, th, td { margin: 0; padding: 0; border: 0; outline: 0; font-size: 100%; vertical-align: baseline; background: 0 0; } body { margin: 0 auto; color: #666; font: 14px/22px 'Open Sans',Georgia,serif; background: #f0f3f4; overflow-x: hidden; } |
Now we will need to add gatsby-browser.js file so that it can apply this style globally to our site. The file resides on the root folder where you will also find gatsby-config.js
|
1 |
touch gatsby-browser.js |
We also need to edit the file to tell it where our global.css file is residing.
|
1 |
import "./src/styles/global.css" |
Now we will have the global style that we have applied to our site.
Gatsby component module styling
Gatsby allows us to use css modules out of the box. We will be using css modules for our header, we will create a header.js file inside of the src/components folder.
|
1 2 |
mkdir src/components touch src/components/header.js |
I will now copy and paste my header source into the header.js file. Below I have replaced with Link and I am also passing in a prop into my function, so that I can use the data that will be passed in. I have also replaced the css class to use className rather.
|
1 2 3 4 5 6 7 8 9 10 11 12 13 14 15 16 17 18 19 20 21 22 23 24 25 26 27 28 29 30 31 32 33 34 35 |
import React from "react" import { Link } from "gatsby" const Header = (props) => ( <div className="header-wrapper clearfix"> <div className="logo-default"> <div className="logo-text"> <Link to="/">{props.title}</Link> <br /> <span>{props.tagline}</span> </div> </div> <div className="top-bar"> <div className="menu-wrap"> <div className="menu-top-menu-container"> <ul id="menu-top-menu" className="main-nav"> <li id="menu-item-1565" className="menu-item menu-item-type-custom menu-item-object-custom current-menu-item current_page_item menu-item-home menu-item-1565"> <Link to="/">Home</Link> </li> <li id="menu-item-1563" className="menu-item menu-item-type-post_type menu-item-object-page menu-item-1563"> <Link to="/contact">Contact</Link> </li> <li id="menu-item-1564" className="menu-item menu-item-type-post_type menu-item-object-page menu-item-1564"> <Link to="/about">About</Link> </li> </ul> </div> </div> </div> </div> ) export default Header |
As you can see there are a lot of css elements here and wordpress generates a lot of stuff by default. Not necessary clean html I guess.
Now let’s create our style for our header.js file, we will create a file called header.module.css inside the components folder.
|
1 2 3 4 5 6 7 8 9 10 11 12 13 14 15 16 17 18 19 20 21 22 23 24 25 26 27 28 29 30 31 32 33 34 35 36 37 38 39 40 41 42 43 44 45 46 47 48 49 50 51 52 53 54 55 56 57 58 59 60 61 62 63 64 65 66 67 68 69 70 71 72 73 74 75 76 77 78 79 80 81 82 83 84 85 86 87 88 89 90 91 92 93 94 95 96 97 98 99 100 101 102 103 104 105 106 107 108 109 110 111 112 113 114 115 116 117 118 119 120 121 122 123 124 125 126 |
.header-wrapper { width: 100%; margin: 0 -999px; padding: 25px 999px 30px; z-index: 100; background: #2f353e; position: relative; box-shadow: rgba(0,0,0,.15) 0px 0px 5px; -moz-box-shadow: rgba(0,0,0,.15) 0px 0px 5px; -webkit-box-shadow: rgba(0,0,0,.15) 0px 0px 5px; } .clearfix { *display: inline-block; height: 1%; } .clearfix:after { content: ""; display: block; clear: both; visibility: hidden; font-size: 0; height: 0; } .logo-default { float: left; } .logo-text { font-size: 28px; font-weight: 200; line-height: 30px; padding: 6px 0 0 15px; } .logo-text a { color: #5f5e5c; font-weight: 700; letter-spacing: -1px; } .logo-text span { font-size: 11px; line-height: 16px; font-weight: 400; color: #888; } .main-nav .current-menu-item a { font-weight: 900; color: #b4c9dc; } .main-nav a:first-child { padding-left: 0; } .main-nav a { color: #8695a2; float: left; padding: 5px 25px; display: block; font-family: 'Open Sans',Georgia,serif; font-weight: 700; font-size: 13px; } .top-bar { float: right; margin: 13px 0 0; } .menu-wrap { float: right; position: relative; } .main-nav, .main-nav ul { margin: 0; padding: 0; list-style-type: none; list-style-position: outside; position: relative; } .main-nav { float: left; position: relative; z-index: 999; } ol, ul { list-style: none; } .main-nav li { float: left; position: relative; } .main-nav>li { float: left; padding: 0; margin: 0; display: inline; } .main-nav .current-menu-item a { font-weight: 900; color: #b4c9dc; } .main-nav a:first-child { padding-left: 0; } .main-nav a { color: #8695a2; float: left; padding: 5px 25px; display: block; font-family: 'Open Sans',Georgia,serif; font-weight: 700; font-size: 13px; } a { color: #68aecf; } a { text-decoration: none; color: #68aecf; } |
Now we need to modify our header.js file to use these css styles. By default I am using kebab-case for my css, and in our javacript code I can refer to the style by camel casing e.g main-nav becomes mainNav.
Below you will see the clean version of the header.js file where I imported the style and used it in the component.
|
1 2 3 4 5 6 7 8 9 10 11 12 13 14 15 16 17 18 19 20 21 22 23 24 25 26 27 28 29 30 |
import React from "react" import { Link } from "gatsby" import headerStyles from "./header.module.css" const Header = (props) => ( <div className={[headerStyles.headerWrapper, headerStyles.clearfix].join(" ")}> <div className={headerStyles.logoDefault}> <div className={headerStyles.logoText}> <Link to="/">{props.title}</Link> <br /> <span>{props.tagline}</span> </div> </div> <div className={headerStyles.topBar}> <div className={headerStyles.menuWrap}> <div> <ul className={headerStyles.mainNav}> <li><Link to="/">Home</Link></li> <li><Link to="/contact">Contact</Link></li> <li><Link to="/about">About</Link></li> </ul> </div> </div> </div> </div> ) export default Header |
You may see something funky above where I use join for two styles. In React you need to use an array and join it with two styles in order for it to have two styles in one component. One of the nice thing about using modules is that all the css styles will be unique to the site, so no conflict at all. e.g headerStyles.logoDefault will be converted by Gatsby to header-module–logo-default–1YbkP.
Launching the site
Finally we need to modify our src/pages/index.js and use our Header file inside of it. We will also pass in 2 properties into Header, the title and tagline of our blog.
|
1 2 3 4 5 6 7 8 9 |
import React from "react" import Header from "../components/header" export default function Home() { return ( <Header title="Taswar Bhatti" tagline="The synonyms of software simplicity" /> ) } |
Finally lets launch the develop server and view how it looks like.
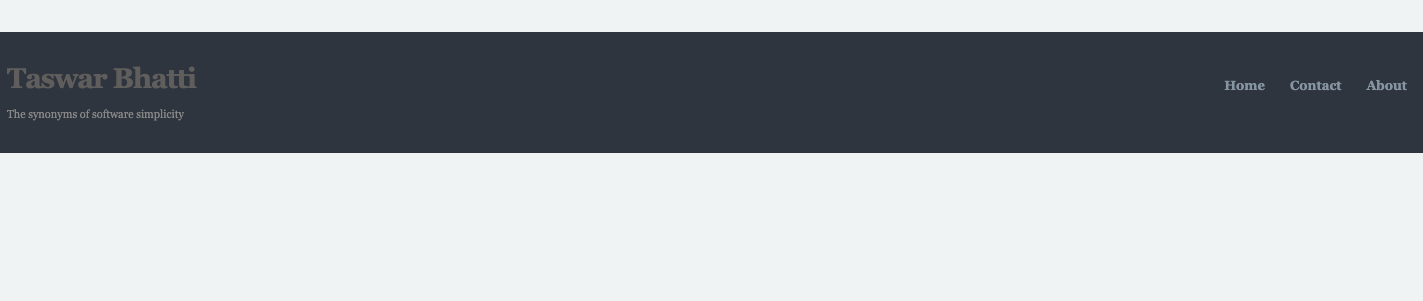
headerpage-from-gatsby
Summary
We covered styling using global styles and also how to use components modules css to style a component. How Gatsby will auto generate css unique code so that there are no conflicts between other components and styles. I hope you see that by default your code will be quite clean by gatsby. Next up we will try to cover more the body and footer for the blog.

Leave A Comment